

There’s something incredibly satisfying about starting your day with a warm, cheesy, and flavorful breakfast sandwich. Baked breakfast sandwiches offer the ultimate balance of convenience and taste, making them perfect for busy mornings, meal prepping, or feeding a crowd. Unlike their pan-fried counterparts, baked sandwiches allow flavors to meld beautifully while maintaining the ideal texture—crispy on the outside, soft and cheesy on the inside.
Table of Contents
Discover more delicious recipes and ideas by visiting our homepage!
In this comprehensive guide, we’ll explore everything you need to know, from the best ingredients to foolproof baking methods. You’ll also discover expert tips for meal prep, freezing, reheating, and even customization ideas to suit different dietary preferences. Whether you love a classic egg-and-cheese sandwich or want to experiment with gourmet variations, this guide has you covered.
Why Baked Breakfast Sandwiches Are a Game-Changer
1. Less Mess, More Convenience
Unlike stovetop or fast-food versions, baking your sandwiches eliminates greasy pans and excessive cleanup. Simply assemble, bake, and enjoy—no flipping or monitoring required.
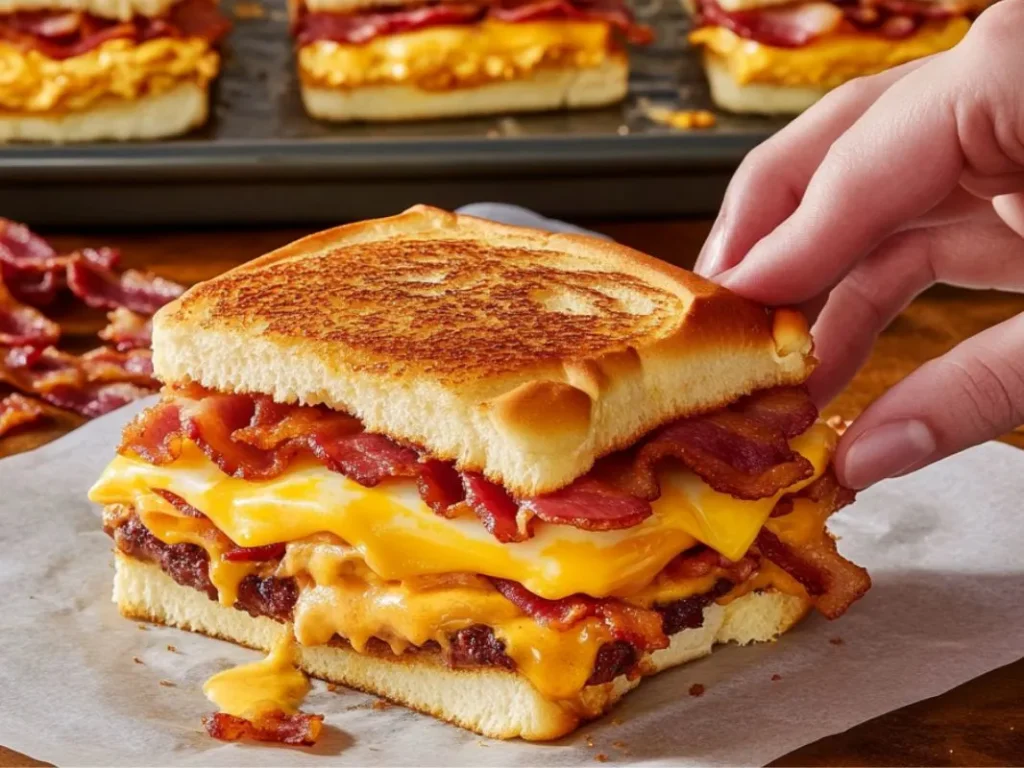
2. Perfectly Melted Cheese & Toasty Bread
Baking creates a deliciously crispy exterior while ensuring the cheese melts evenly and the flavors blend harmoniously. No more cold centers or burnt edges!
3. Ideal for Meal Prep & Bulk Cooking
Baked sandwiches are great for meal prepping, making them a fantastic option for families, meal planners, or anyone with a busy schedule. Plus, they store well and taste just as good when reheated.
Best Ingredients for Baked Breakfast Sandwiches
Crafting the perfect sandwich starts with selecting the right ingredients. Here’s what you’ll need:
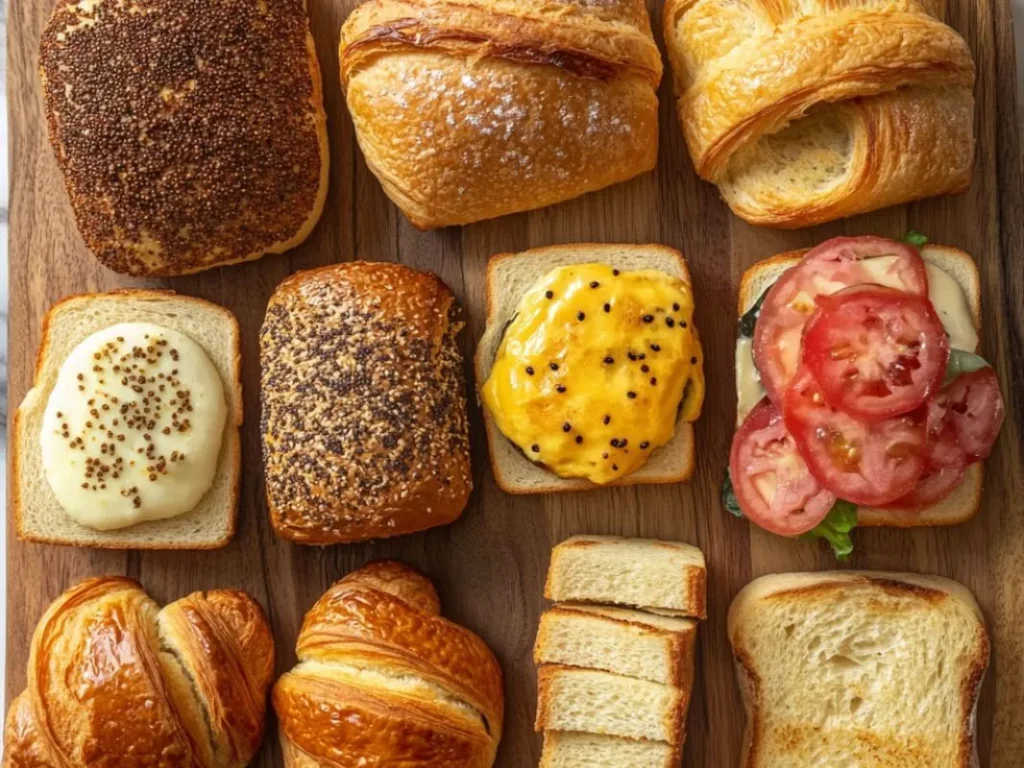
1. Choosing the Best Bread
The right bread makes all the difference in taste and texture. Here are some excellent choices:
- English Muffins – Slightly crispy when baked, a classic breakfast favorite.
- Croissants – Buttery and flaky for an indulgent, bakery-style experience.
- Bagels – Chewy and substantial, perfect for holding hearty fillings.
- Brioche Buns – Soft, slightly sweet, and ideal for a rich, savory contrast.
Pro Tip: Avoid using bread that is too soft (like white sandwich bread) unless toasted beforehand, as it may turn soggy when baked.
2. Protein Options: What Works Best?
Protein is essential for a filling breakfast sandwich. Here are some delicious choices:
- Eggs – Scrambled, fried, or baked in muffin tins for easy portioning.
- Bacon – Crispy or chewy, depending on your preference.
- Sausage Patties – Classic, flavorful, and easy to bake.
- Ham or Turkey – Leaner options with great taste.
Pro Tip: To save time, cook all proteins in advance and store them in the fridge for quick assembly.
3. Cheese: The Melty Secret Ingredient
Melted cheese ties everything together! Some of the best choices include:
- Cheddar – Sharp, rich, and classic.
- Swiss – Nutty and mild.
- Mozzarella – Stretchy, gooey, and creamy.
- Pepper Jack – Adds a spicy kick for extra flavor.
4. Sauces & Extras
- Butter or Mayo – Adds richness and prevents dryness.
- Mustard or Hot Sauce – Adds a tangy or spicy element.
- Avocado or Spinach – For extra nutrients and freshness.
Step-by-Step Guide to Making Baked Breakfast Sandwiches
1. Prepping the Ingredients
Before assembling, prep each component:
- Cook the eggs – Scramble or bake in muffin tins for even portions.
- Prepare the protein – Cook bacon until crispy or heat sausage patties.
- Slice the cheese – Pre-cut cheese for easy layering.
- Butter the bread – Optional, but adds flavor and crispiness.
2. Assembling the Sandwiches
- Place the bottom halves of the bread on a baking sheet.
- Add a layer of cheese, then your protein of choice.
- Place the cooked eggs on top.
- Add another slice of cheese (for extra meltiness).
- Cover with the top halves of the bread.
How to Bake Breakfast Sandwiches to Perfection
To achieve the best texture and flavor, follow these foolproof baking steps:
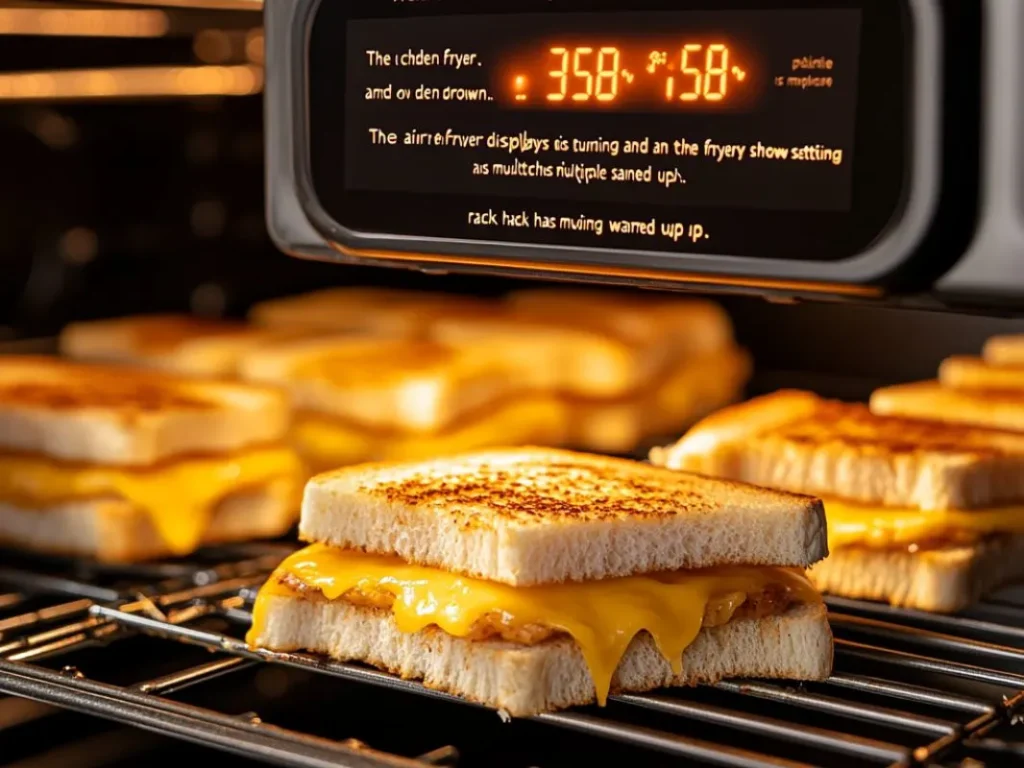
Oven Baking Instructions
- Preheat oven to 350°F (175°C).
- Wrap sandwiches in foil for a softer texture or leave uncovered for crispier bread.
- Bake for 15-20 minutes, until the cheese is fully melted and the bread is toasted.
Pro Tip: For an ultra-crispy finish, uncover the sandwiches for the last 5 minutes of baking.
Meal Prep Tips: How to Make Breakfast Sandwiches in Advance
If you want to save time, meal-prepping your breakfast sandwiches is a game-changer.
1. Best Practices for Meal Prepping
- Make in bulk – Prepare 6-12 sandwiches at once.
- Use parchment paper to separate layers in storage.
- Cool completely before storing to avoid sogginess.
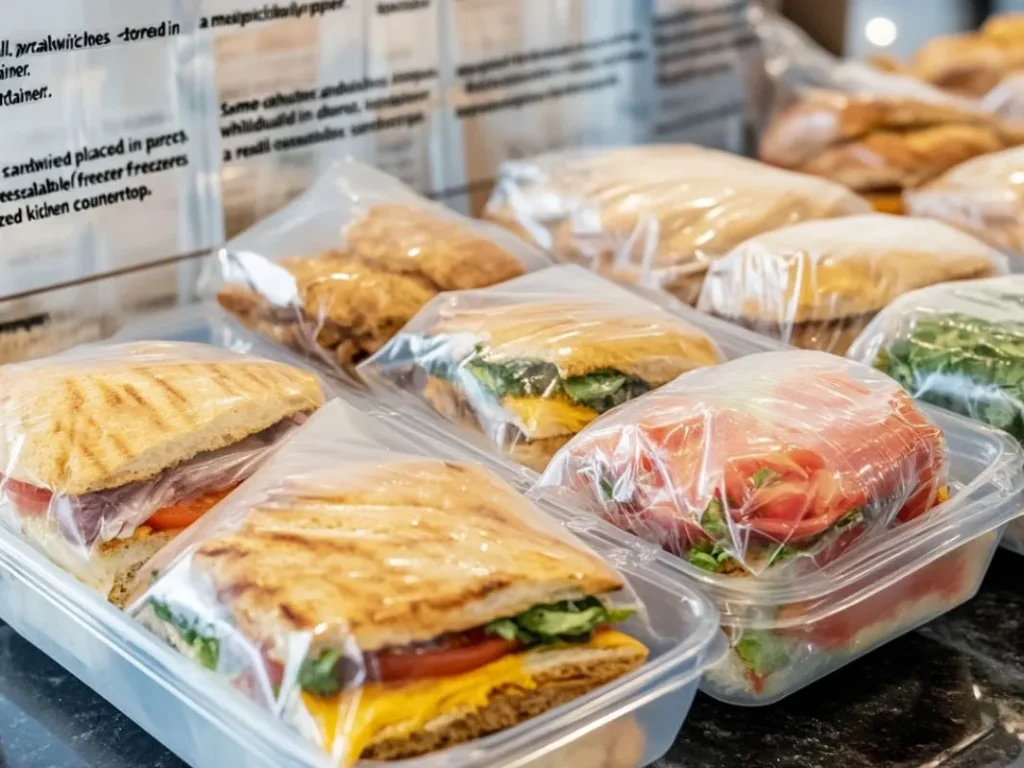
2. Storage Methods
- Refrigerate: Store in an airtight container for up to 5 days.
- Freeze: Wrap individually in plastic wrap, then place in a freezer bag.
How to Reheat Baked Breakfast Sandwiches for the Best Taste
To maintain freshness and avoid sogginess, follow these reheating tips:
1. Reheating from Refrigeration
- Microwave: Heat for 30-45 seconds.
- Oven: Bake at 350°F (175°C) for 5-7 minutes.
2. Reheating from Freezing
- Microwave (wrapped in a paper towel): Heat for 1.5 – 2 minutes.
- Oven: Bake at 350°F (175°C) for 15 minutes.
Common Mistakes to Avoid When Making Baked Breakfast Sandwiches
Even with a simple recipe, mistakes can happen. To ensure your baked breakfast sandwiches turn out perfect every time, avoid these common pitfalls:
1. Overloading the Sandwich
It’s tempting to pile on extra ingredients, but too many layers can make the sandwich difficult to eat and prevent even cooking. Stick to a balanced ratio of bread, protein, cheese, and toppings.
2. Skipping Pre-Toasting
If you’re using soft bread, toasting it slightly before assembling helps maintain its structure and prevents sogginess.
3. Using Cold Ingredients
Cold cheese and eggs can lead to uneven melting. For the best results, let all ingredients come to room temperature before assembling.
4. Not Wrapping Properly
If you prefer soft sandwiches, wrapping them in foil during baking locks in moisture. If you want a crispy finish, remove the foil in the last five minutes.
5. Improper Freezing
Freezing a sandwich while it’s still warm traps moisture, causing sogginess when reheated. Always cool sandwiches completely before wrapping and freezing.
Pro Tips & Creative Variations for Baked Breakfast Sandwiches
To take your baked breakfast sandwiches to the next level, try these expert tips and creative twists.
1. How to Customize the Flavor
- Sweet & Savory – Swap traditional bread for a cinnamon-raisin bagel and add honey mustard.
- Spicy Kick – Add jalapeños or sriracha mayo for extra heat.
- Protein Boost – Double the protein with bacon and sausage for an extra-filling meal.
2. Dietary Adaptations
- Gluten-Free Version – Use gluten-free English muffins or bagels.
- Keto-Friendly Option – Replace bread with baked egg rounds or cheese wraps.
- Dairy-Free Alternative – Swap out regular cheese for plant-based cheese alternatives.
FAQs: Everything You Need to Know About Baked Breakfast Sandwiches
1. How do you make baked breakfast sandwiches step by step?
Making baked breakfast sandwiches is incredibly easy and allows you to prepare multiple servings at once. Here’s a step-by-step guide:
- Preheat your oven to 350°F (175°C).
- Prepare your ingredients – cook eggs, bacon, or sausage in advance.
- Assemble the sandwiches by layering cheese, protein, and eggs on your bread of choice.
- Wrap sandwiches in foil for a softer texture or leave uncovered for crispier bread.
- Bake for 15-20 minutes, or until the cheese melts and the bread is golden brown.
- Serve immediately or store for later.
For the best texture, consider toasting the bread slightly before assembling to prevent sogginess.
2. Can I make breakfast sandwiches in the oven instead of on a stovetop?
Absolutely! Baking breakfast sandwiches in the oven is one of the best ways to prepare them, especially if you’re making multiple sandwiches at once. Unlike stovetop cooking, where you must flip each sandwich individually, oven baking ensures even heating, consistent cheese melting, and less mess. Plus, it allows you to batch cook several sandwiches in one go, making it ideal for meal prep.
To bake them properly, just assemble the sandwiches on a baking sheet, cover them loosely with foil (if you prefer softer bread), and bake at 350°F (175°C) for 15-20 minutes.
3. What’s the best bread for baked breakfast sandwiches?
The best bread for baked breakfast sandwiches depends on your texture preference. Here are some of the top choices:
- English Muffins – Great for a slightly crispy, sturdy base.
- Bagels – Chewy and hearty, excellent for holding lots of toppings.
- Croissants – Buttery, flaky, and rich—ideal for a gourmet twist.
- Brioche Buns – Soft and slightly sweet, adding a nice contrast to savory fillings.
- Sourdough Slices – Provides a tangy flavor with a crispier bite when toasted.
If you prefer a crunchier texture, leave the sandwiches uncovered while baking. If you enjoy a soft and fluffy sandwich, wrap them in foil to keep moisture locked in.
4. How do I meal prep baked breakfast sandwiches for the entire week?
Meal prepping baked breakfast sandwiches can save you a ton of time on busy mornings. Follow these steps to keep them fresh and delicious:
- Make a large batch – Prepare 6-12 sandwiches at once.
- Cool them completely – This prevents moisture buildup and sogginess.
- Wrap each sandwich individually – Use plastic wrap or foil for airtight storage.
- Refrigerate for up to 5 days or freeze for up to 3 months.
- Label and date your sandwiches – This helps keep track of freshness.
For extra flavor, store your sandwiches with a small sheet of parchment paper between layers to prevent sticking and maintain texture.
5. Can I freeze and reheat baked breakfast sandwiches without ruining the texture?
Yes! Freezing is an excellent way to preserve baked breakfast sandwiches for later. Here’s how to do it properly:
How to Freeze:
- Once the sandwiches have cooled, wrap each one individually in plastic wrap.
- Place them in a ziplock freezer bag or an airtight container.
- Label with the date and store for up to 3 months.
How to Reheat:
- From the fridge: Microwave for 30-45 seconds, or bake at 350°F for 5-7 minutes.
- From the freezer: Microwave for 1.5 – 2 minutes (wrap in a paper towel to prevent sogginess), or bake at 350°F for 15 minutes.
For crispy sandwiches, place them in a toaster oven instead of a microwave.
6. How long should I bake breakfast sandwiches for the best results?
Baking times may vary slightly depending on your oven and the type of bread used, but a general guideline is:
- 350°F (175°C) for 15-20 minutes – Standard baking time for most breakfast sandwiches.
- Add 5 extra minutes if using frozen sandwiches.
- Remove foil in the last 5 minutes of baking for a crispier top layer.
To ensure the best texture, check that the cheese is melted and the bread is golden brown before removing them from the oven.
7. Can I customize baked breakfast sandwiches to fit dietary needs?
Yes! There are plenty of ways to customize your baked breakfast sandwiches to suit different diets:
- Low-Carb/Keto: Swap the bread for lettuce wraps or baked egg patties.
- Gluten-Free: Use gluten-free English muffins, bagels, or sandwich bread.
- Dairy-Free: Substitute plant-based cheese and use dairy-free butter or mayo.
- High-Protein: Double up on eggs and add lean turkey sausage or bacon.
Additionally, adding spinach, avocado, or roasted vegetables boosts the nutritional value while keeping the sandwiches tasty and satisfying.
8. Are baked breakfast sandwiches good for kids?
Yes! Baked breakfast sandwiches are a great option for kids because they are:
- Easy to hold – Small enough for little hands to manage.
- Customizable – You can adjust the ingredients based on their taste preferences.
- Nutritious – Packed with protein, healthy fats, and essential nutrients.
For a kid-friendly twist, try mini sliders using Hawaiian rolls or cutting sandwiches into halves or quarters for easy eating.
9. Can I prepare baked breakfast sandwiches the night before?
Yes! If you’re short on time in the morning, you can assemble your sandwiches the night before and store them in the fridge overnight. This helps the flavors blend together, making them taste even better when baked the next morning.
- Storage Tip: Keep the sandwiches wrapped in foil or an airtight container to prevent drying out.
- Baking Tip: If baking straight from the fridge, add an extra 2-3 minutes to the total baking time to ensure even heating.
10. What are the best side dishes to serve with baked breakfast sandwiches?
Pairing your baked breakfast sandwiches with the right side dishes can make your meal even more satisfying. Some great options include:
- Fresh fruit – Berries, banana slices, or apple wedges for a natural sweetness.
- Greek yogurt – A protein-packed side that complements savory sandwiches.
- Hash browns or roasted potatoes – A crispy, hearty addition.
- Smoothies or fresh juice – A refreshing beverage choice.
For an extra brunch-style meal, serve with a light salad or a cup of soup to round out the flavors.
11. Can I air fry baked breakfast sandwiches instead of using an oven?
Yes! If you want a quick and crispy alternative, using an air fryer is a great option.
How to Air Fry Baked Breakfast Sandwiches:
- Preheat the air fryer to 350°F (175°C).
- Place the sandwiches in a single layer in the air fryer basket.
- Cook for 6-8 minutes, flipping halfway through.
- Check that the cheese has melted and the bread is crispy.
Using an air fryer gives sandwiches a golden brown crust while keeping the inside soft and gooey.
These detailed answers ensure you’re fully prepared to make, store, and customize your baked breakfast sandwiches like a pro. Whether you’re meal prepping for the week or trying a new flavor twist, these sandwiches are sure to become a go-to breakfast staple!
PrintBaked Breakfast Sandwiches
- Total Time: 25-30 minutes
- Yield: 6 sandwiches 1x
Description
Start your day with a warm, cheesy, and satisfying Baked Breakfast Sandwich! These sandwiches offer the perfect balance of crispy, toasted bread and gooey melted cheese while being incredibly convenient to prepare. Unlike pan-fried versions, baking allows the flavors to meld beautifully with less mess and effort. Perfect for busy mornings, meal prepping, or feeding a crowd, these sandwiches can be made in bulk, stored, and easily reheated for a quick and delicious breakfast.
Ingredients
For the Sandwiches:
- 6 English muffins, bagels, croissants, or brioche buns
- 6 large eggs, scrambled or baked
- 6 slices of cheese (cheddar, Swiss, mozzarella, or pepper jack)
- 6 slices of bacon or 6 sausage patties
- 2 tablespoons butter or mayonnaise (optional)
Optional Add-ins:
- ½ teaspoon mustard or hot sauce
- ½ avocado, sliced
- Handful of spinach leaves
Instructions
1. Prepping the Ingredients:
- Preheat your oven to 350°F (175°C).
- If using bacon or sausage, cook them in advance and set aside.
- Scramble the eggs in a pan or bake them in a muffin tin for easy portioning.
- Slice the cheese and prepare any additional toppings.
2. Assembling the Sandwiches:
- Slice the bread and spread butter or mayo on the inside of each half (optional).
- Place the bottom halves of the bread on a lined baking sheet.
- Add cheese, followed by bacon, sausage, or egg.
- Place another slice of cheese on top of the egg for extra meltiness.
- Cover with the top half of the bread.
3. Baking Instructions:
- Wrap each sandwich in foil for a softer texture, or leave them uncovered for a crispier finish.
- Bake for 15-20 minutes, or until the cheese is melted and the bread is toasted.
- For an ultra-crispy finish, uncover the sandwiches for the last 5 minutes of baking.
- Prep Time: 10 minutes
- Cook Time: 15-20 minutes
- Category: Breakfast
- Cuisine: American
Nutrition
- Serving Size: 1 sandwich per serving
- Calories: ~350-450 kcal
- Fat: 20-25g
- Carbohydrates: 30-35g
- Protein: 15-20g
Conclusion: Why Baked Breakfast Sandwiches Should Be Your Go-To Morning Meal
Baked breakfast sandwiches are more than just a quick breakfast option—they are a versatile, time-saving, and delicious solution for busy mornings. Whether you’re preparing a fresh batch for a weekend brunch or meal-prepping for the week ahead, these sandwiches provide the perfect balance of convenience, flavor, and nutrition.
By selecting the right bread, using high-quality proteins and cheeses, and experimenting with different fillings, you can create endless variations to suit your taste and dietary preferences. The baking process ensures a perfectly toasty texture, evenly melted cheese, and a well-balanced bite every time. Plus, by following proper meal prep techniques, you can store, freeze, and reheat these sandwiches without compromising their taste or texture.
Another major advantage of baked breakfast sandwiches is their ability to cater to different lifestyles. Whether you need a hearty, protein-packed meal, a gluten-free alternative, or a low-carb option, there’s a version for everyone. The ability to prepare them in advance also makes them ideal for families, busy professionals, and students who need a reliable breakfast without spending extra time in the kitchen each morning.
Incorporating baked breakfast sandwiches into your routine can transform your mornings from stressful and rushed to smooth and satisfying. No more skipping breakfast or settling for processed, store-bought options—these homemade sandwiches allow you to control the ingredients, ensuring a healthier, tastier, and more satisfying start to your day.
Whether you enjoy a classic egg-and-cheese combination, a gourmet croissant sandwich, or a spicy southwestern twist, the possibilities are endless. So next time you’re planning your breakfasts for the week, consider baking a batch of these delicious, portable sandwiches. Your future self will thank you when you have a ready-made, satisfying breakfast waiting for you each morning!


2 thoughts on “Baked Breakfast Sandwiches: A Perfect Morning Meal for Busy Mornings”