

Few things are as satisfying as biting into a crisp, golden cone that holds your favorite scoop of ice cream. While store-bought cones do the job, homemade ones elevate the dessert experience. That’s why a reliable, tried-and-true waffle cone recipe is worth mastering. With the right ingredients, tools, and a little know-how, anyone can craft cones that stay crunchy, taste amazing, and hold their shape to the last bite.
Plus, making cones from scratch gives you full control—whether you want them sweeter, crispier, or infused with flavors like cocoa, cinnamon, or citrus zest. Whether you’re setting up a backyard sundae bar or prepping for a birthday bash, these homemade waffle cones are guaranteed to impress.
jump to
Discover more delicious recipes and ideas by visiting our homepage!
First Things First: Setting Up for Success
Before diving into your waffle cone recipe, the first crucial step is preparation:
✅ Preheat your waffle cone maker or pizzelle press
✅ Lay out your cone mold
✅ Set up a wire cooling rack for airflow
Timing is everything. As soon as a disc is cooked, it must be rolled while it’s still hot and flexible. Missing this moment can lead to misshapen or brittle cones.
👉 Pro Tip: Make a test disc first to find the perfect temperature and timing on your iron. Each machine varies, and this step ensures even browning and easy release.
Essential Ingredients for the Best Waffle Cone Recipe
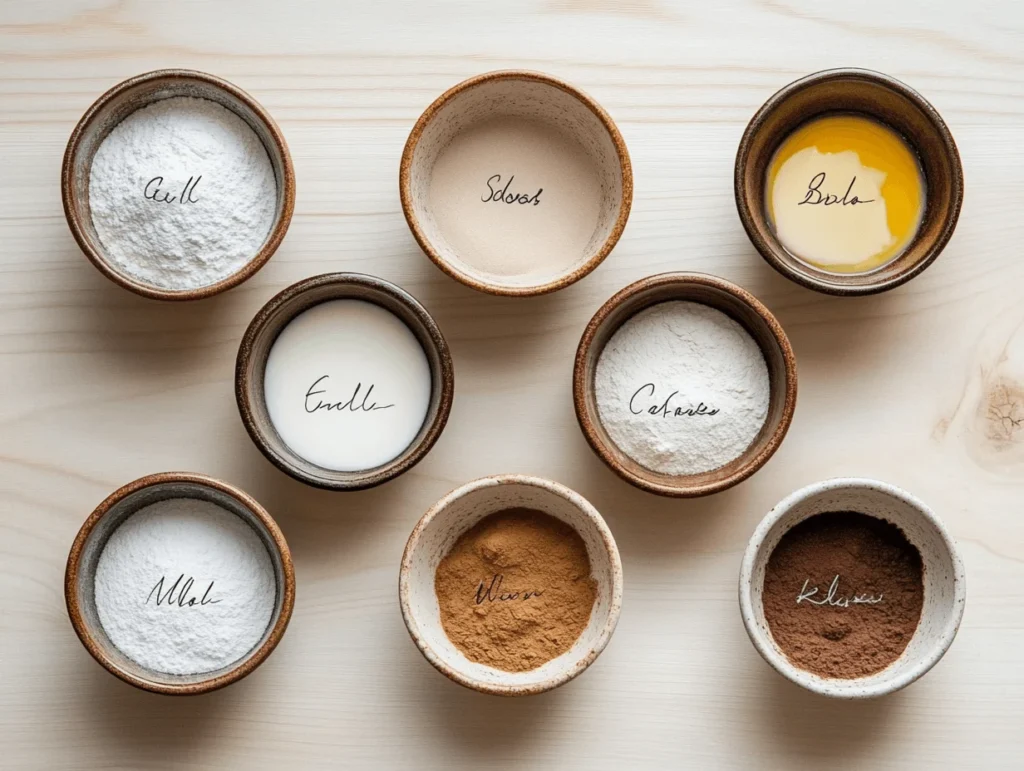
Start strong with high-quality ingredients:
| Ingredient | Amount | Notes |
|---|---|---|
| All-purpose flour | 1 cup | Use sifted for a smooth, lump-free batter |
| Sugar | ¾ cup | White sugar caramelizes best |
| Eggs | 2 large | Room temperature works best |
| Unsalted butter | ¼ cup | Melted and slightly cooled |
| Vanilla extract | 1 tsp | Adds warmth and depth |
| Whole milk | ⅓ cup | Can sub almond or oat milk |
Optional Flavor Add-ins:
- 1 tbsp cocoa powder for chocolate cones
- ½ tsp cinnamon for warmth
- 1 tsp orange zest for a citrusy twist
Try brown butter instead of regular for a rich, nutty upgrade to your waffle cone recipe.
Must-Have Tools
- Waffle cone maker or electric pizzelle press
- Cone shaper
- Silicone spatula
- Wire cooling rack
- Mixing bowl
- Silicone mat or parchment paper
🔄 Pro Tip: Proper airflow during cooling is key to keeping your cones crisp.
Step-by-Step Waffle Cone Recipe
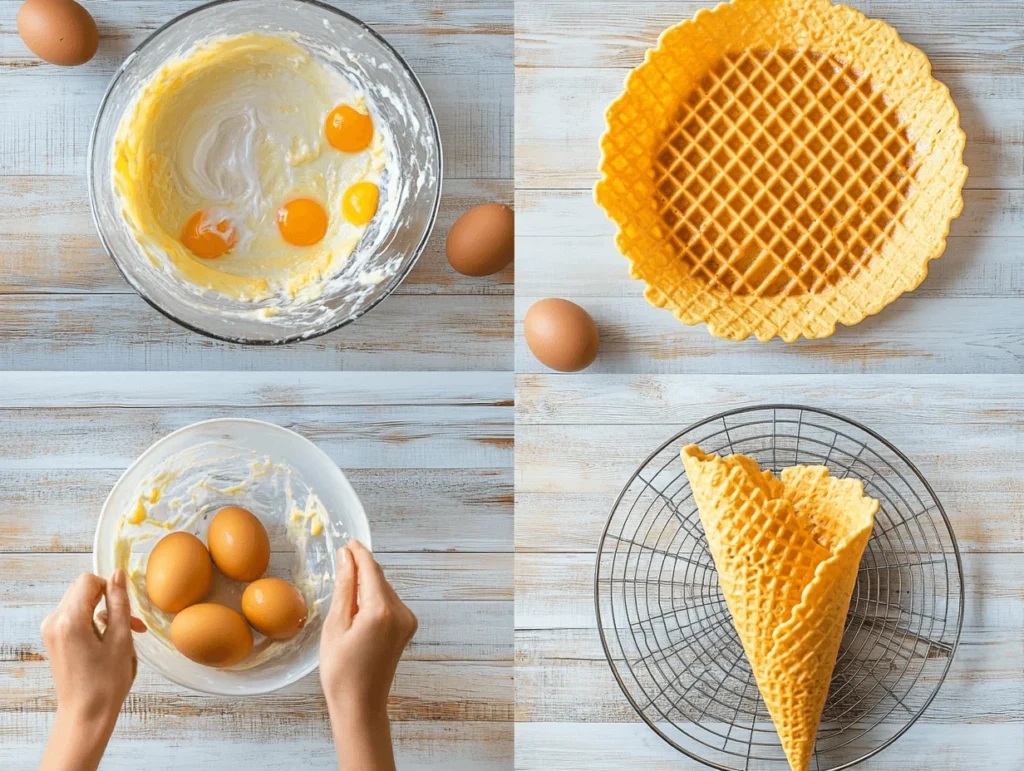
Step 1: Mix the Batter
Whisk eggs and sugar until foamy. Add melted butter and vanilla. Gradually mix in sifted flour and milk until smooth and pourable (slightly thicker than pancake batter). Let it rest for 5–10 minutes.
Step 2: Preheat and Grease
Turn on your waffle cone maker and let it heat for 3–5 minutes. Lightly grease both plates with butter or oil using a silicone brush.
Step 3: Cook and Shape
Add 2 tbsp batter to the center of the iron. Cook for 1–2 minutes until golden brown. Lift the hot disc and quickly wrap it around your cone mold. Hold for 10 seconds.
Place seam-side down on a cooling rack and repeat.
🛑 Too hot to handle? Use a clean kitchen towel to protect your fingers.
Optional: Dress Up the Edges

Dip the cooled cone tops in melted chocolate and decorate with:
- Sprinkles
- Crushed nuts
- Toasted coconut
These add flair for parties or dessert platters and make your waffle cone recipe even more memorable.
Waffle Cone vs. Sugar Cone: What’s the Difference?
| Feature | Waffle Cone | Sugar Cone |
|---|---|---|
| Texture | Light, airy, crisp | Dense, crunchy, caramelized |
| Flavor Adaptable | Yes – cocoa, zest, spices | Not easily flavored |
| Shape Flexibility | Can be shaped into cones or bowls | Standard uniform shape |
| DIY Friendly | Great for home recipes | Usually mass-produced |
For flavor and customization, a waffle cone recipe is the clear winner.
Troubleshooting: Why Are My Waffle Cones Soggy?
Problem: Cooling on a solid surface
Fix: Use a wire rack so steam escapes.
Problem: Batter too wet
Fix: Measure precisely. If too runny, add 1–2 tbsp of flour.
Problem: Underbaked
Fix: Add 15–30 seconds to cook time. The discs should be a deep golden brown.
Revive soggy cones in a 250°F oven for 3–5 minutes, then cool again on a rack.
Advanced Tips to Perfect Your Waffle Cone Recipe
Precision Shaping
Shape immediately while warm. Use a tight cone mold to seal the tip. Wrap in parchment and clip while cooling for perfect form.
Storage That Keeps Cones Crisp
- Let cones cool fully on a rack
- Store in airtight containers with a rice sachet or food-safe desiccant
- Wrap individually in parchment for longer shelf life
Fun Variations to Try
Flavored Batter Ideas
- Mocha Cone: Add 1 tsp espresso powder
- Holiday Spice Cone: Mix in ¼ tsp nutmeg or ginger
- Lemon Cone: Swap vanilla for lemon extract + zest
Unique Presentations
- Shape into bowls using muffin tins
- Make mini cones for mousse or pudding shots
- Use in parfaits or layered desserts
Check out these dessert cup recipes for creative ways to serve your waffle creations!
Frequently Asked Questions
Q: What’s the first step in making a waffle cone?
Preheat your iron and set up your cone mold and cooling rack.
Q: Why are my cones soft?
Too much moisture or poor airflow during cooling. Use a wire rack and store properly.
Q: How do I keep cones crunchy?
Cool individually, store in airtight containers with a moisture absorber.
Q: Can I use pancake mix in a waffle cone maker?
Not ideal. Pancake mix lacks the sugar-fat ratio needed for crispness.
Q: Can you freeze waffle cones?
No. Freezing adds moisture, which ruins the texture.

Waffle Cone Recipe That Delivers the Perfect Crunch Every Time
- Total Time: 20 minutes
- Yield: 6–8 cones 1x
Description
Crisp, golden, and wonderfully customizable—this waffle cone recipe turns your kitchen into an ice cream parlor. Whether dipped in chocolate or filled with your favorite scoop, these homemade cones bring next-level crunch and flavor to every bite.
Ingredients
1 cup all-purpose flour (sifted)
¾ cup granulated sugar
2 large eggs (room temperature)
¼ cup unsalted butter (melted and cooled)
1 tsp vanilla extract
⅓ cup whole milk
Optional Add-ins:
1 tbsp cocoa powder (for chocolate cones)
½ tsp cinnamon
1 tsp orange or lemon zest
Instructions
Mix the Batter
In a bowl, whisk eggs and sugar until foamy. Add butter and vanilla. Gradually whisk in flour and milk until smooth. Let rest for 5–10 minutes.Preheat the Iron
Preheat your waffle cone maker or pizzelle press. Lightly grease plates with butter or oil.Cook the Cone
Drop 2 tbsp batter into the center of the iron. Close and cook for 1–2 minutes until golden brown.Shape Immediately
Remove and quickly wrap the hot disc around a cone mold. Hold for 10 seconds. Let cool seam-side down on a wire rack.
Optional Decoration
Dip cooled cone edges in melted chocolate and decorate with sprinkles, crushed nuts, or coconut.
Notes
- Make a test disc first to find your ideal cook time.
- Keep cones crisp by cooling on a wire rack.
- Store in airtight containers with a food-safe desiccant or a sachet of dry rice.
- Prep Time: 10 minutes
- Cook Time: 10 minutes
- Cuisine: American
Nutrition
- Serving Size: 1 cone
- Calories: 160
- Sugar: 13g
- Sodium: 35mg
- Fat: 6g
- Carbohydrates: 24g
- Fiber: 0.5g
- Protein: 3g
Conclusion: Why Homemade Waffle Cones Are Worth It
Mastering a homemade waffle cone recipe takes your desserts to new heights. Not only are the results fresher and more flavorful than store-bought, but they’re also endlessly customizable—from batter flavor to cone shape.
With a few simple tools and quality ingredients, you can serve up crunchy, golden cones at any event. They’re the perfect canvas for creative toppings, scoops, or layered treats—and they’re guaranteed to impress every time.
So preheat your waffle iron, roll up your sleeves, and enjoy the delicious satisfaction of cones made from scratch.
Want to enjoy waffle cones as part of a healthy morning routine? Try pairing them with fruit and yogurt from our breakfast recipes without eggs for a delicious, high-protein start to your day.


2 thoughts on “Waffle Cone Recipe That Delivers the Perfect Crunch Every Time”